
Uploading your files
Many times during the review process you will be uploading plan and document files. There are a few options to upload your files.
Applicant Upload or Prescreen Correction Tasks
In the beginning of the process, you’ll be uploading files at the Applicant Upload or Prescreen Correction Tasks.
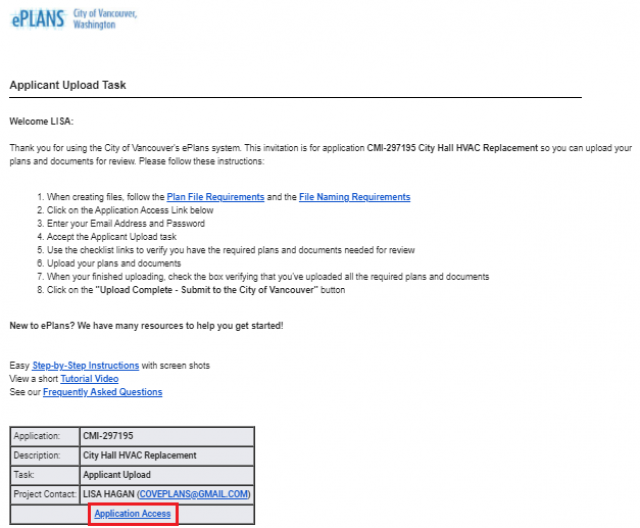
Email Invitation: Click on the ‘Application Access’ link in the email invitation from ePlans.
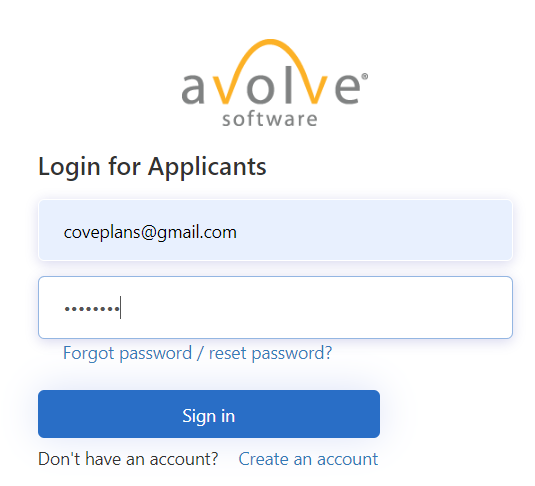
Login to ePlans: This takes you to the ePlans Login screen. Enter your email address and password and click ‘Sign in’.
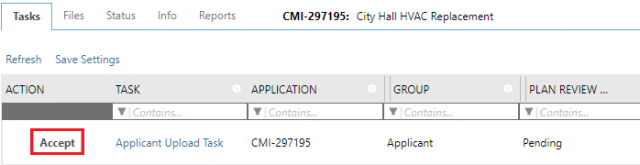
Open the Task: Click on the ‘Accept’ or ‘Complete’ button next to the ‘Applicant Upload Task’ in the Tasks tab. You can also click on the Applicant Upload Task name.
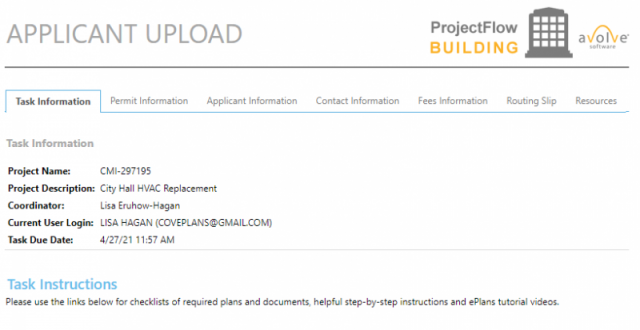
This opens the task as seen in the image below. You can now upload your plans and documents.
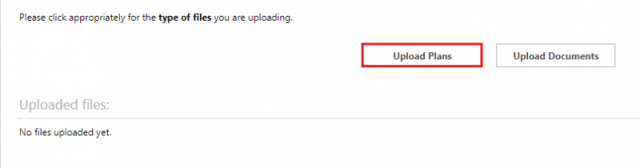
Select Plans or Documents: Scroll down in the task and click on the appropriate button to Upload Plans or to Upload Documents.
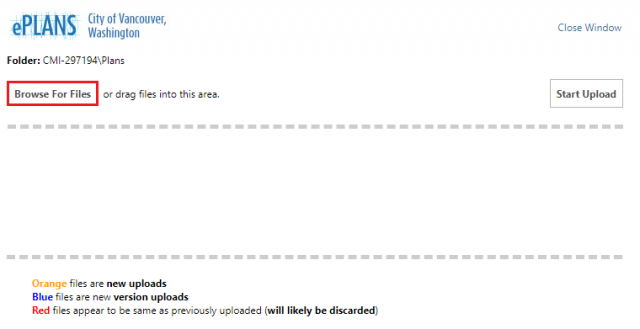
Browse for Files: Click on the ‘Browse For Files’ button to select the files you want to upload. You can also drag and drop files into this window for upload.

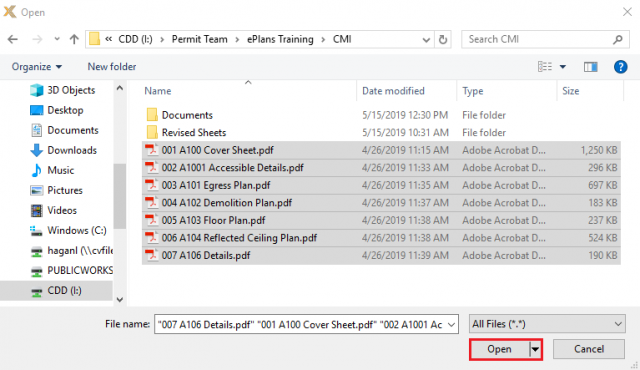
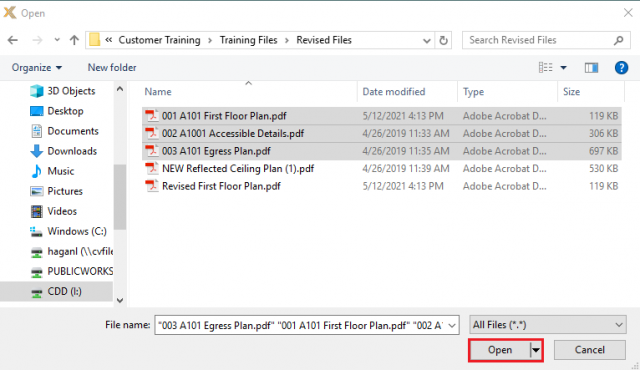
Select the Files: Select the files to upload from your computer. Multiple files can be selected by using your Shift or Ctrl keys. Click the ‘Open’ button shown in the image below to select those files to upload.
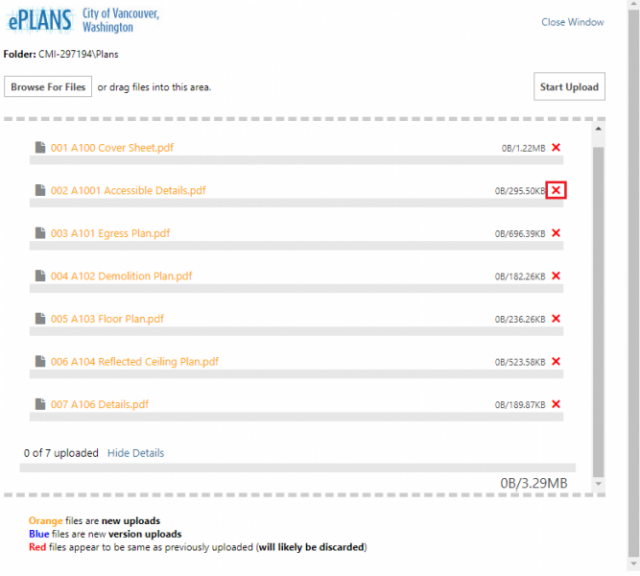
Reviewing/Deleting Files. The window will now show you the files you selected. You can click on the X to the right to remove any files you selected. This is your one opportunity to remove a file so be sure and scroll up and down and verify you have the correct files selected and remove any you don’t want uploaded.
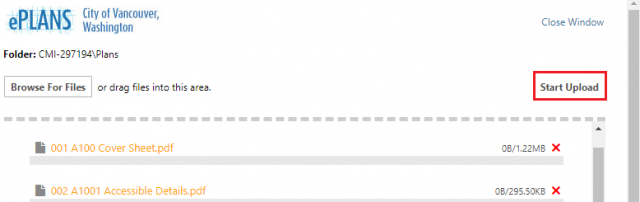
Start Upload: Once you’ve verified you have the correct files, click on the ‘Start Upload’ button.
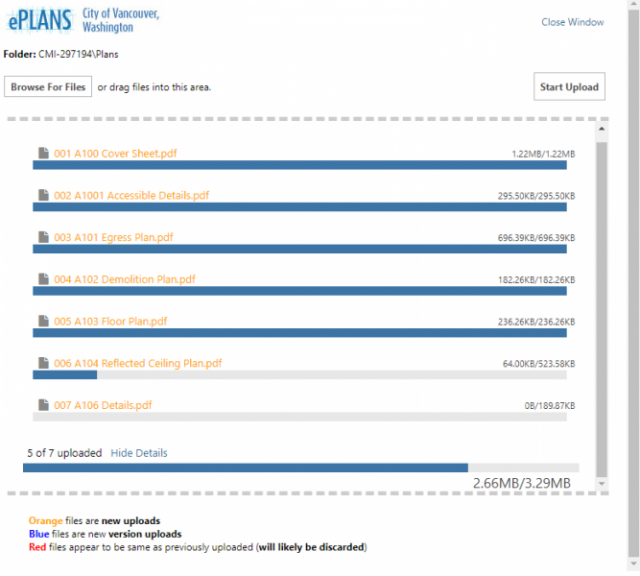
You’ll see the status bar update as it uploads each file:
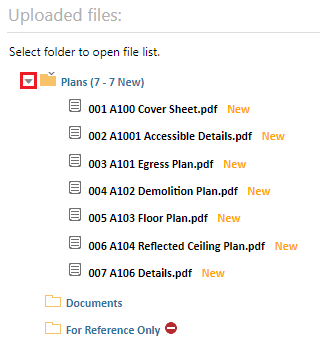
Viewing Files: You can now see the files that are uploaded to the folder you selected by clicking on the expand button.
You can scroll up and continue to use the ‘Upload Plans’ or ‘Upload documents’ buttons to upload more files. Please see our webpages on the Applicant Upload Task and the Prescreen Correction Task.
Applicant Resubmit Task
In the middle of the process, you’ll be uploading files at the Applicant Resubmit Task. In this task, you have a couple options on how to upload files.
Email Invitation: Click on the ‘Application Access’ link in the email invitation from ePlans.
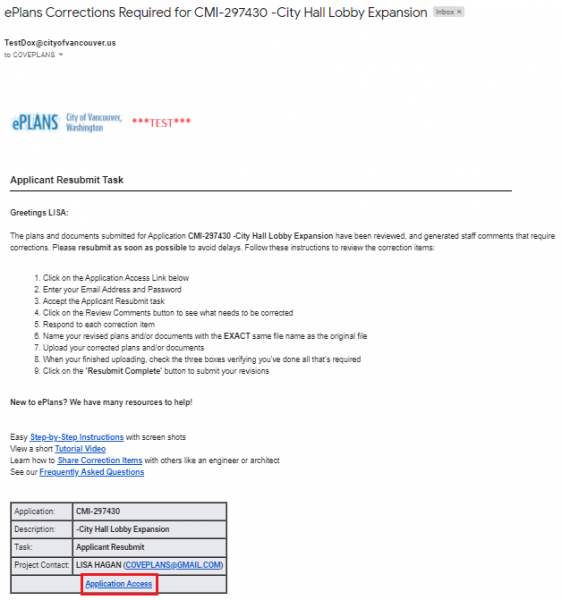
Login to ePlans: This takes you to the ePlans Login screen. Enter your email address and password and click ‘Sign in’.

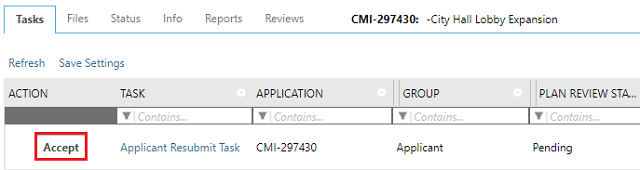
Open the Task: Click on the ‘Accept’ or ‘Complete’ button next to the ‘Applicant Resubmit Task’ in the Tasks tab. You can also click on the Applicant Resubmit Task name.
This opens the task as seen in the image below. You can now upload your plans and documents.

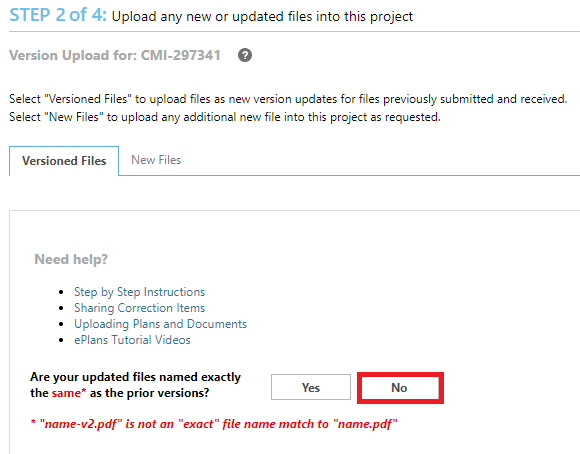
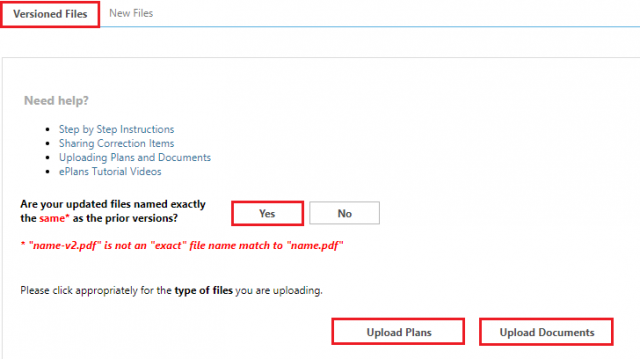
Select Versioned Files or New Files Tab: Scroll down in the task and click on the appropriate tab to select Versioned Files or New Files. Use the Versioned Files tab if you are uploading a new file that is replacing an existing file in ePlans. Use the New Files tab if you are adding a plan page or document to your submittal that was not previously uploaded to ePlans.
Versioned Files
If you select the Versioned Files tab, it will ask if your new files are named the exact same as the original file.
If you select Yes, ePlans will not change your file names and you’ll have the option to Upload Plans or Upload Documents. Please see the section under the New Files Tab for those instructions.
If you select No, ePlans will automatically rename your new file with the same as the existing one. These steps are outline below.
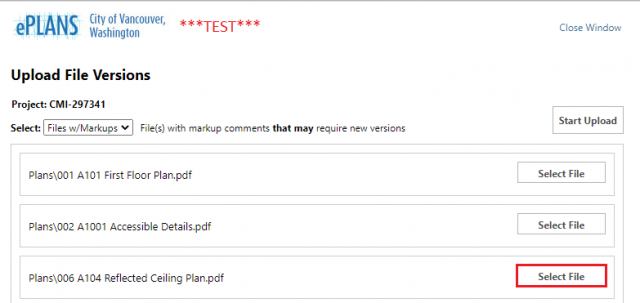
Upload File Versions: A window will open that displays all the files that have markups on them. Choose the file you want to replace and click on the ‘Select File’ button.
Select the File: Select the new file from your computer. Click the ‘Open’ button.

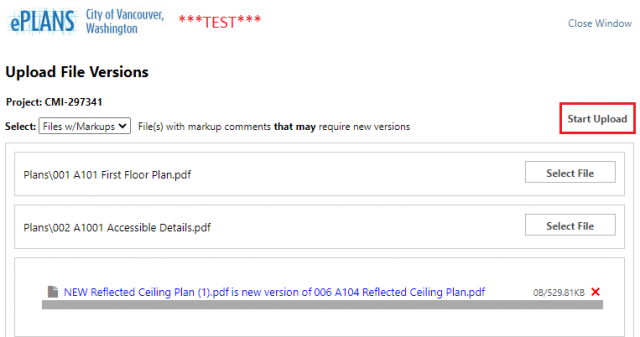
Reviewing/Deleting Files. The window will now show you the name of the new file that you selected and the name of the file it will replace. Since the new file name does not need to match the existing file name, it’s very important that you verify you have the correct file selected. If you do not, click on the red ‘X’ to the right to remove the file you selected and repeat the steps above to select the correct file. This is your one opportunity to remove an incorrect file before you upload it to ePlans.
Start Upload: Once you’ve verified you have the correct file selected to replace the existing file, click on the ‘Start Upload’ button.
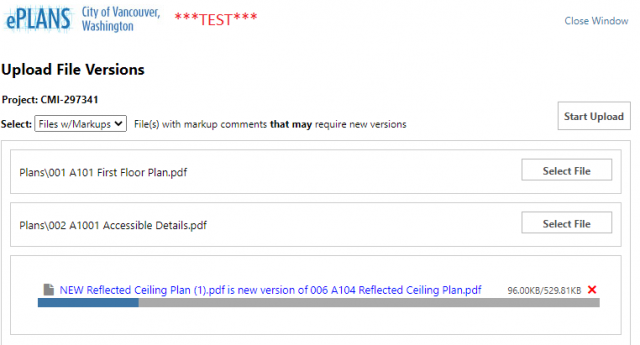
You’ll see the status bar update as it uploads the file:
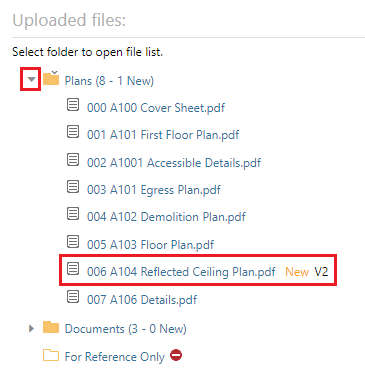
Viewing Files: Scroll down and under Uploaded Files, you can view the files that are uploaded to the folder you selected by clicking on the expand button. ePlans will automatically rename the new file you selected with the same name as the existing file so it creates a new version of that file in ePlans. Behind the file name you’ll see New in orange and a V# letting you know it’s a new version of the existing file.
You can scroll up and continue to use the No under the Versioned Files tab to upload more versioned files as many times as necessary until your submittal is complete. Please see the instructions below on how to upload new files or our webpage on the Applicant Resubmit Task for more information.
New Files
If you are on the Versioned Files tab and select Yes or if you clicked on the New Files tab, you will see an Upload Plans and an Upload Documents button.
Select Plans or Documents: Click on the appropriate button to Upload Plans or to Upload Documents. Below are the two options you may see:
Or

Browse for Files: Click on the ‘Browse For Files’ button to select the files you want to upload. You can also drag and drop files into this window for upload.
Select the Files: Select the files to upload from your computer. Multiple files can be selected by using your Shift or Ctrl keys. Click the ‘Open’ button shown in the image below to select those files to upload.
Reviewing/Deleting Files: The window will now show you the files you selected.
A file name in Orange means that is a new file that is not currently uploaded to ePlans. This will be correct if you are adding an additional page into an existing plan set. It will not be correct if this should be replacing an existing file. It would mean the new file name does not match the existing file name.
A file name in Blue is a new version of an existing file. If you are uploading multiple revised files at once, all the file names should be blue since the new file names should match the existing files in ePlans.
A file name in Red means that ePlans has compared the new file you selected to upload with the existing file in ePlans with the same name and the two files are identical. Since no change was made to the file, ePlans will not upload it.
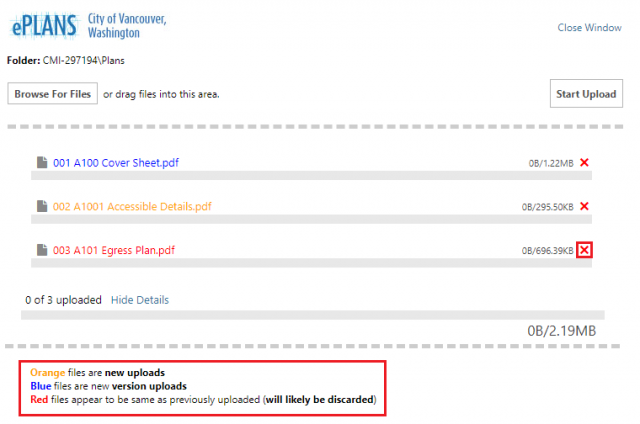
You can click on the X to the right to remove any files you selected. This is your one opportunity to remove a file so be sure and scroll up and down and verify you have the correct files selected and remove any you don’t want uploaded.
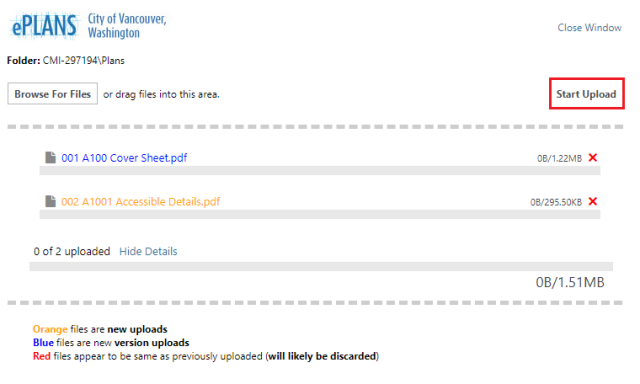
Start Upload: Once you’ve verified you have the correct files, click on the ‘Start Upload’ button.
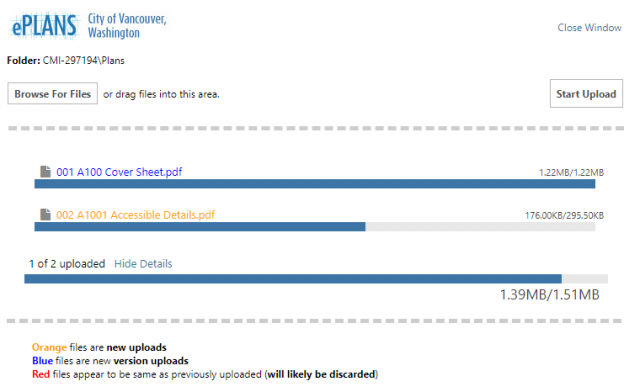
You’ll see the status bar update as it uploads the file:
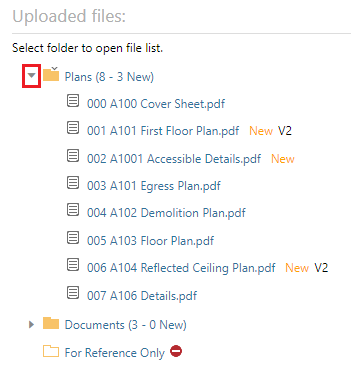
Viewing Files: Scroll down and under Uploaded Files, you can view the files that are uploaded to the folder you selected by clicking on the expand button. Behind the file name you’ll see New in orange and a V# if it’s a new version of an existing file.
Inserting a new plan page between two existing plan pages in your submittal
Please use the example below on how to correctly name a new page so it inserts at the correct spot in your existing submittal.
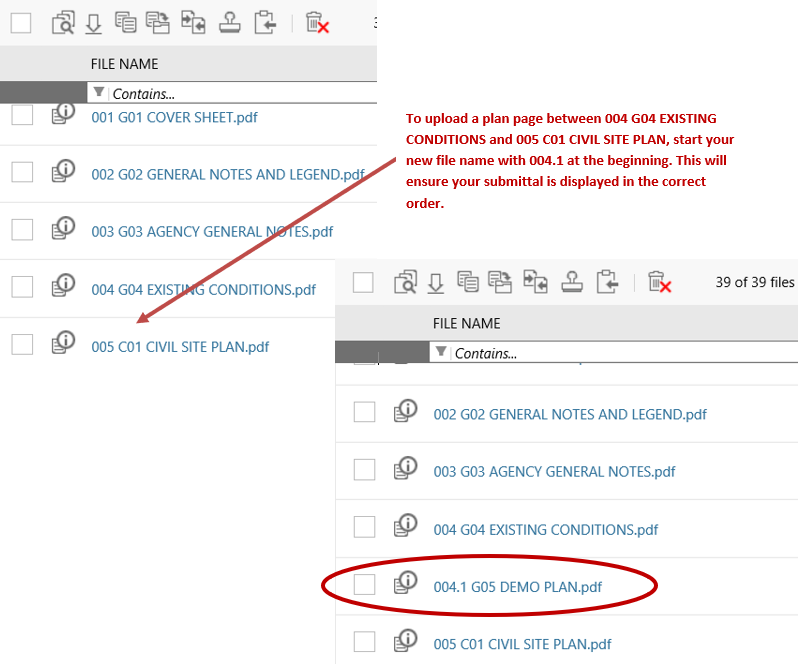
This method is how you would insert a new plan page into your existing submittal while maintaining all the existing plan page numbers.
If you have any questions, please contact us so we can help.